If you wish to measure alone, please see [Measure by Yourself].
If the measurement does not go well, please read [Tips for Accurate Measurement].
-
Prepare the Walking Area
-
Prepare for Measurement
-
Measure Using the Camera
-
View the Results
-
How to Review the Data
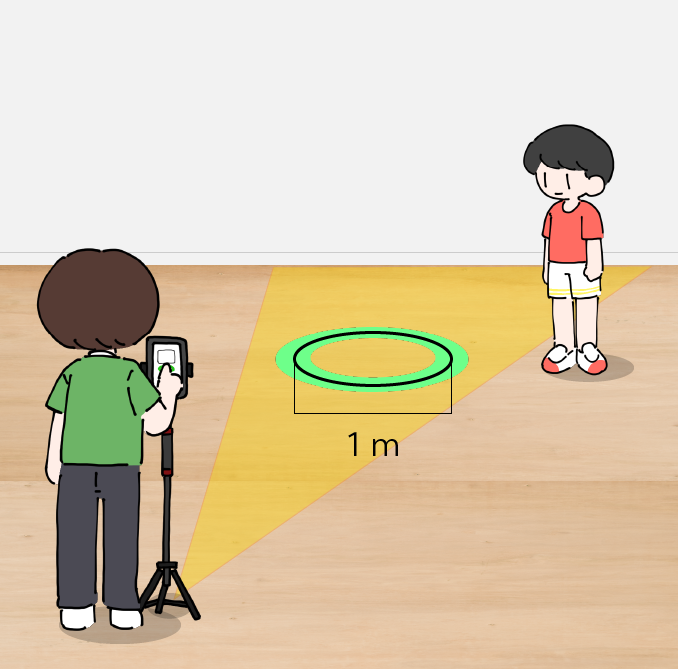
Choose an open area with a simple background — no other people or objects should appear behind the participant.
Ensure there is enough space (about 3 meters from the device) for circular walking.
A circle with a diameter of about 1 meter is sufficient.
Mark the circle on the floor with visible tape or other markers.
Ask the participant to wait outside the camera view.
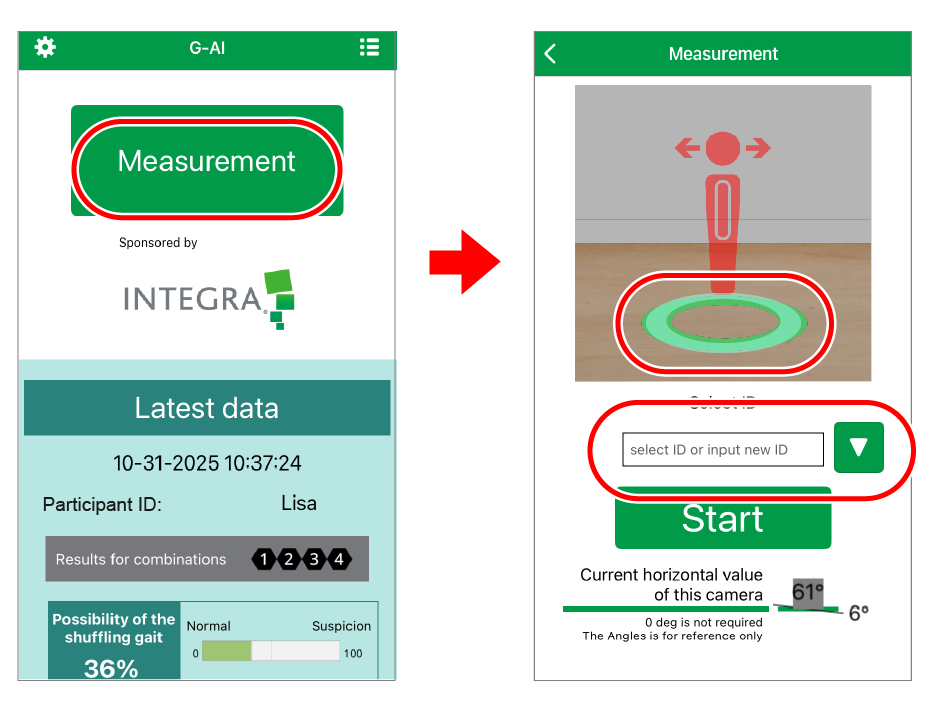
The operator taps “Go to Measurement Screen.”
Enter the participant’s ID in the participant ID field.
For details about participant IDs, please see [About participant IDs].
Once entered, the same ID will appear in the dropdown list for future measurements.
When the camera activates, a guide overlay will appear on the screen.
Align the guide with the circular floor marker and fix the camera position (a tripod is recommended for stability).
Now you’re ready to measure.
◆ About the Level Indicator
The measurement screen displays the device’s angle detected by the gyroscope sensor.
This value is for reference only and can be used as a guide to keep measurement conditions consistent.
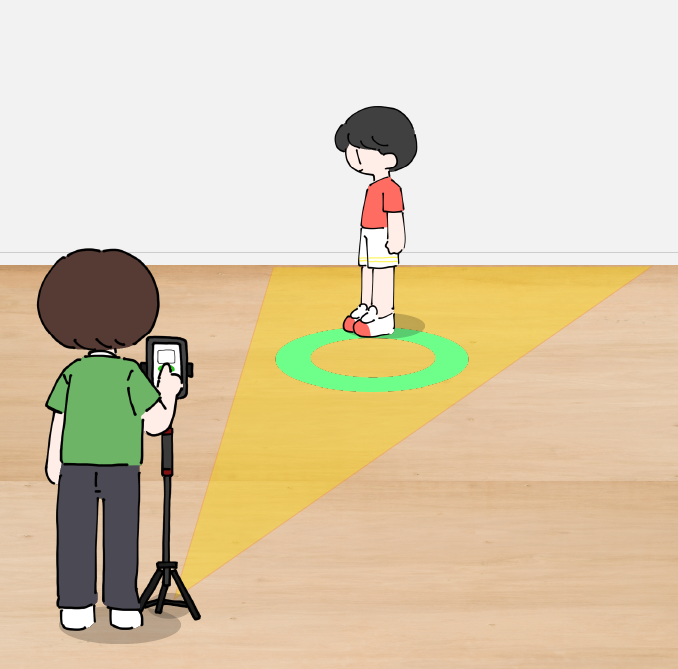
The participant should stand on the far side of the circle as seen from the camera, facing either to the left or to the right.
When the system detects the participant correctly, the human-shaped silhouette turns from red to green.
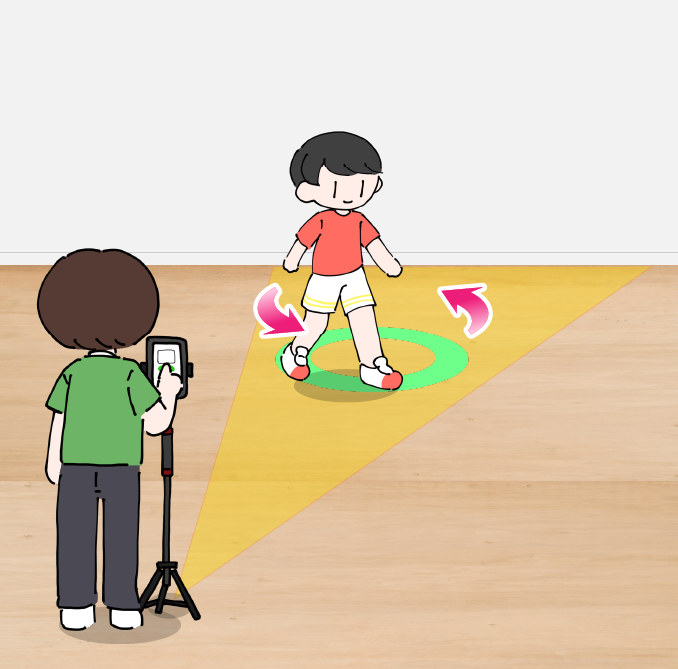
The operator taps “Start Measurement.”
The background turns black, and the participant begins to walk around the circle.
Measurement starts automatically once walking is detected.
Continue walking until the progress indicator reaches 100%.
When the measurement is complete, the screen will automatically switch.

Tap the [ i ] icon next to each item to see explanations of the analysis results.
If you have notes, enter them in the memo field and tap “Save.”
After tapping “Done,” the data is saved locally on the device, and you’ll return to the home screen.
Scroll down on the home screen to view the most recently measured data.
For instructions on viewing and exporting measurement results, see [View & Export Data in Gait Analyzer Insight (G-AI)].
Measure by Yourself
-
Prepare the Walking Area
-
Adjust Settings and Prepare the Device
-
Get Ready for Measurement
-
Measure Using the Camera
-
View the Results
-
How to Review the Data

Choose a simple background where no one else appears in view.
Ensure about 3 meters of space from the device for circular walking.
A 1-meter diameter circle is sufficient.
Mark the circle on the floor with visible tape or markers.
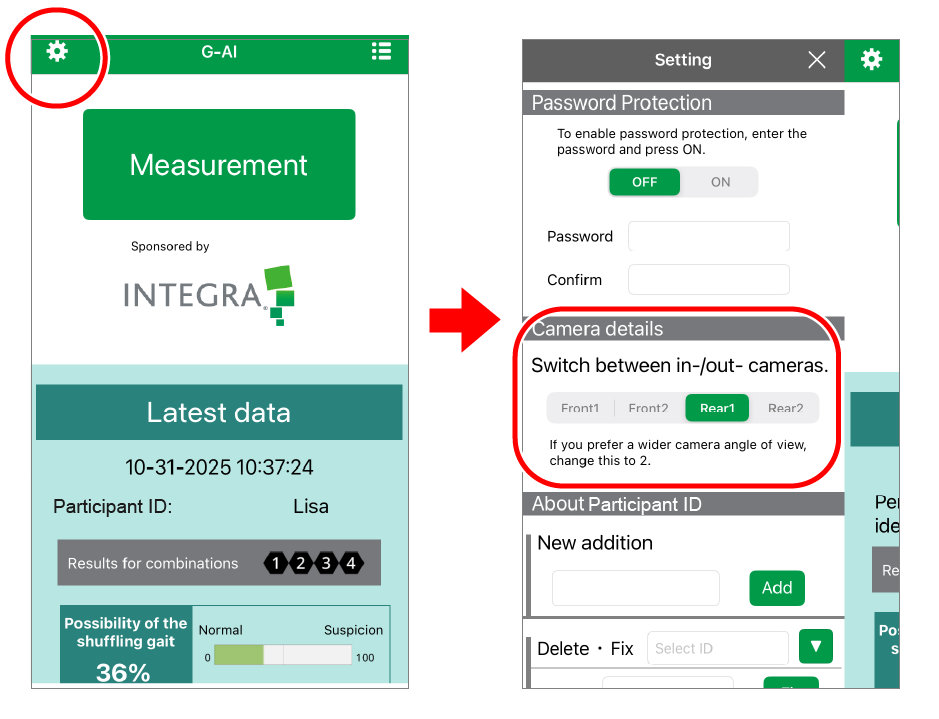
From the gear icon at the top left of the home screen, open the Settings screen.
Tap Camera Details > InCam1 or InCam2.
Return to the home screen and fix the device on a tripod.
Tap “Go to Measurement Screen.”
Enter the participant ID in the participant ID field.
For more details, see [About participant IDs].
Previously entered IDs will appear in the dropdown list.
When the camera activates, align it with the floor marker using the guide overlay and fix the position.
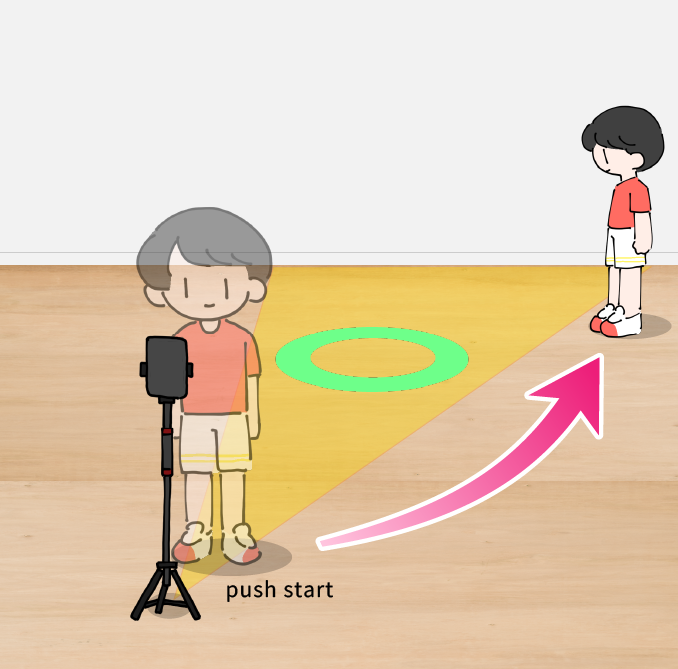
Tap “Start Measurement” and move near the circular guide so that you are not yet in view.
Now you’re ready to measure.
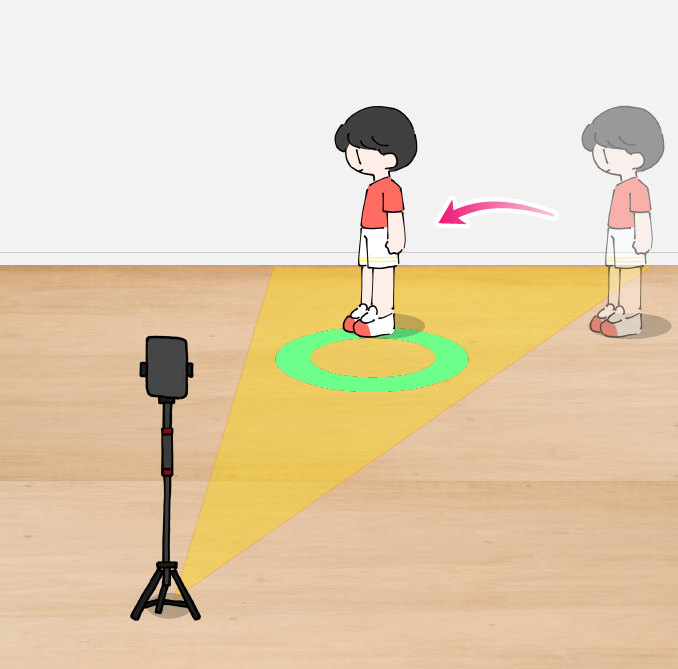
Step into the camera view and stand on the far side of the circle, facing either left or right.
When the participant is detected correctly, the screen will automatically change to a black background.
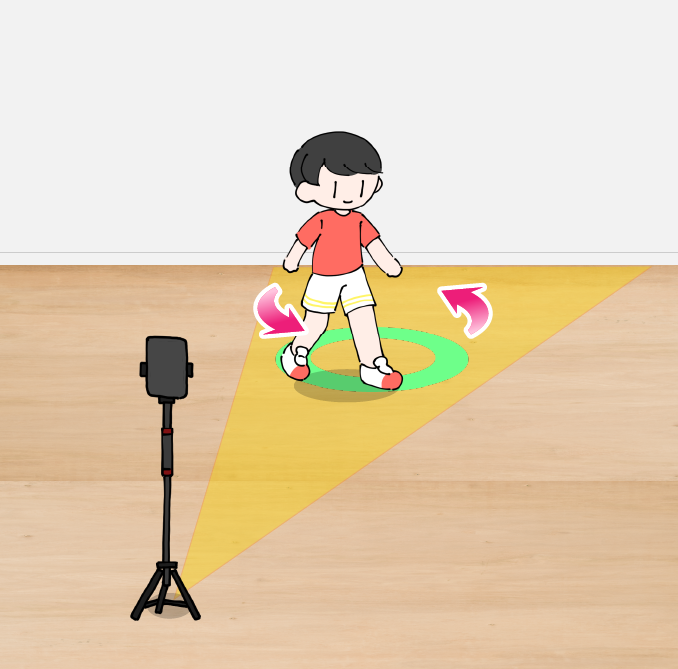
Walk continuously around the circle.
Measurement begins automatically when walking is detected.
Continue until the progress indicator reaches 100%.
When complete, the screen switches automatically.
Tap the [ i ] icon to view explanations of each analysis item.
If needed, write remarks in the memo field and tap “Save.”
After tapping “Done,” data is saved on the device and you’ll return to the home screen.
Scroll down to see the most recent data.
For instructions on viewing and exporting measurement results, see [View & Export Data in Gait Analyzer Insight (G-AI)].
Tips for Accurate Measurement

・Avoid skirts — they make leg movements harder to detect. Wear pants or other clothing that clearly shows leg shape.
・Neutral or grayish colors work best, as they help the system distinguish light and shadow.
・Clothing that exposes elbows and knees allows for more accurate measurement.
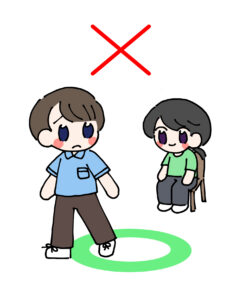
・Make sure no one other than the participant appears in the frame.
・A cluttered background may cause the AI to mistake objects for people — use a simple, clear background.
・Avoid dark or dim environments. Ensure the lighting is as bright as possible.
・If the distance between the camera and the circle cannot be secured to 3 m, go to Settings > Camera Details, select InCam2 or OutCam2 (wide-angle camera), and switch to the wide-angle lens for measurement.

・Walk at your usual pace.
・Stay on the circular marker — do not step outside it.
・If you feel unsure about your balance or walking, please practice walking on the circle by yourself before the measurement.
・You may use assistive devices such as a cane or walker, but please note that they may cause the measurement results to be slightly less accurate.